
Mastering the Art of Copier Maintenance: Expert Tips to Solve Everyday Office Printing Woes
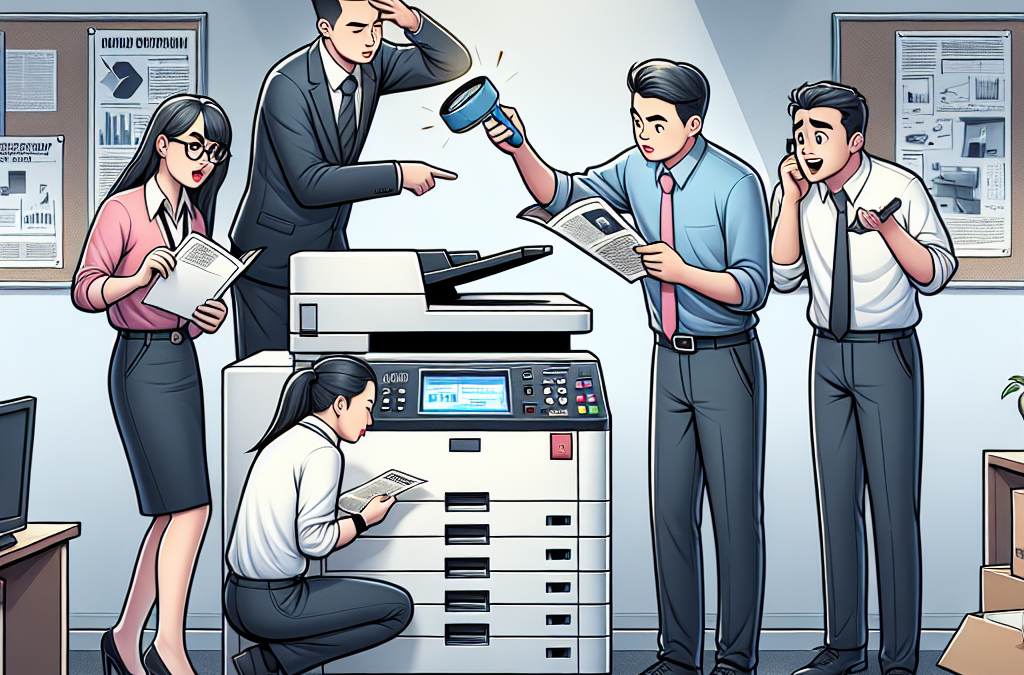
Is there anything more frustrating than needing to make copies for an important meeting, only to find that your office copier is acting up? Copier malfunctions can be a major headache, causing delays and hindering productivity. But fear not, because in this article, we will show you how to troubleshoot common copier problems in your Lauderhill office, so you can get back to business in no time.
From paper jams to streaky prints, we will cover a range of issues that can plague your copier and provide step-by-step solutions to fix them. Whether you are a small business owner or an employee responsible for office equipment maintenance, this guide will equip you with the knowledge and skills to tackle common copier problems head-on. Say goodbye to frustration and hello to smooth printing and copying!
Key Takeaways:
1. Understand the common copier problems: Knowing the most common copier problems, such as paper jams, streaks on copies, and error messages, will help you troubleshoot them effectively. This knowledge will save you time and money by avoiding unnecessary service calls.
2. Follow proper maintenance procedures: Regularly cleaning the copier, replacing worn-out parts, and using high-quality paper and toner will prevent many common problems. Following the manufacturer’s guidelines for maintenance will ensure optimal performance and longevity of your copier.
3. Troubleshoot paper jams: Paper jams are one of the most frequent copier issues. Learn how to identify the cause of the jam, clear it safely, and prevent future jams. Simple techniques like fanning the paper stack and aligning the paper guides can make a big difference.
4. Address streaks and smudges: Streaks and smudges on copies can be frustrating. Learn how to identify the source of the problem, whether it’s a dirty glass or a faulty toner cartridge, and take appropriate actions to clean or replace the affected part. This will ensure high-quality copies every time.
5. Troubleshoot error messages: Copiers often display error messages that can be confusing. Learn how to interpret these messages and follow the recommended troubleshooting steps. Understanding common error codes will help you resolve issues quickly and get your copier back up and running.
Insight 1: The Importance of Regular Maintenance for Copiers
In any office setting, copiers are an essential piece of equipment that sees heavy usage on a daily basis. However, these machines are prone to various problems that can disrupt workflow and productivity. One of the key insights for troubleshooting common copier problems in your Lauderhill office is the importance of regular maintenance.
Regular maintenance plays a crucial role in keeping copiers in optimal working condition. By scheduling routine maintenance checks, you can identify and address potential issues before they escalate into major problems. This not only reduces the risk of unexpected breakdowns but also extends the lifespan of the copier, saving your office money in the long run.
During maintenance checks, technicians can clean the copier’s internal components, such as the rollers and printheads, which can accumulate dust and debris over time. They can also inspect and replace worn-out parts, ensuring smooth operation and preventing paper jams or image quality issues. By investing in regular maintenance, you can minimize downtime and keep your office’s copiers running at their best.
Insight 2: Common Copier Problems and Troubleshooting Techniques
Despite regular maintenance, copiers can still encounter common problems that require troubleshooting. Understanding these issues and their potential solutions can empower Lauderhill office employees to address minor problems on their own, reducing the need for external assistance and minimizing disruption to their workflow.
One common copier problem is paper jams. When a paper jam occurs, it can be frustrating and time-consuming to resolve. However, by following a few simple steps, you can often clear the jam and resume normal operation. These steps include opening the appropriate access panels, gently removing the jammed paper, and ensuring there are no remaining scraps that could cause further issues.
Another common issue is poor image quality. If your office’s copier is producing blurry or faded prints, it may be due to a dirty or misaligned printhead. In such cases, you can try cleaning the printhead using a lint-free cloth and the copier’s built-in cleaning function. If the problem persists, contacting a technician may be necessary to realign or replace the printhead.
Additionally, network connectivity problems can hinder the ability to print or scan documents. Troubleshooting network issues involves checking the copier’s network settings, ensuring it is connected to the correct Wi-Fi network, and restarting both the copier and the router if necessary. If these steps don’t resolve the problem, contacting your IT department or a copier technician may be required to diagnose and fix the issue.
Insight 3: The Role of User Education in Copier Troubleshooting
While regular maintenance and troubleshooting techniques are important, user education also plays a significant role in resolving common copier problems in Lauderhill offices. Providing employees with the necessary knowledge and training can empower them to troubleshoot minor issues independently, reducing the reliance on external support and minimizing downtime.
Investing in user education involves conducting training sessions or workshops to familiarize employees with the copier’s features, functions, and troubleshooting techniques. This can include teaching them how to clear paper jams, change toner cartridges, or perform basic maintenance tasks. By equipping employees with this knowledge, they can quickly address minor problems and avoid unnecessary service calls.
User education can also extend to providing clear instructions on how to operate the copier effectively. This includes guidance on selecting the appropriate paper size and type, adjusting print settings for optimal quality, and utilizing advanced features such as double-sided printing or scanning. By ensuring employees have a good understanding of the copier’s capabilities, they can maximize its efficiency and minimize the occurrence of common problems.
Troubleshooting common copier problems in your Lauderhill office requires a combination of regular maintenance, knowledge of common issues, and user education. By prioritizing these aspects, you can keep your office’s copiers running smoothly, minimize downtime, and maximize productivity.
Section 1: Paper Jams
One of the most common copier problems that office workers encounter is paper jams. Paper jams can be frustrating and time-consuming, but with some troubleshooting techniques, you can quickly resolve the issue. Start by checking the paper tray to ensure that it is properly loaded and that the paper is not wrinkled or torn. Next, open the copier’s doors and carefully remove any jammed paper, being mindful not to tear it further. If the paper is stuck deep inside the machine, consult the copier’s manual or contact a technician for assistance. Additionally, regularly cleaning the copier’s rollers and avoiding overloading the paper tray can help prevent future paper jams.
Section 2: Poor Print Quality
If you notice that the print quality of your copier is deteriorating, there are several troubleshooting steps you can take to address the issue. First, check the toner or ink levels to ensure they are not running low. If they are, replace the cartridge with a new one. Additionally, clean the copier’s print heads or rollers to remove any accumulated dust or debris. If these steps do not improve the print quality, you may need to adjust the copier’s settings or consult a technician to diagnose and fix the underlying problem.
Section 3: Slow Printing Speed
A copier that operates at a slow speed can significantly impact productivity in the office. To troubleshoot this issue, start by checking the copier’s settings to ensure that it is not set to a low-quality or high-resolution mode, as these settings can slow down printing speed. Additionally, make sure that the copier is not processing a large print job or multiple print jobs simultaneously, as this can overload the machine and slow down performance. If the problem persists, consider contacting a technician to assess the copier’s hardware and software for any potential issues.
Section 4: Error Messages
Error messages on a copier can be confusing, but they often provide valuable information about the underlying issue. When troubleshooting error messages, start by referring to the copier’s manual or online resources to identify the specific error code and its meaning. From there, follow the recommended steps to resolve the problem. In some cases, a simple restart of the copier may clear the error. If the error message persists, it may indicate a more significant problem that requires professional assistance.
Section 5: Lines or Smudges on Copies
If your copies have lines or smudges on them, it can be an indication of a dirty copier or a problem with the copier’s components. Begin by cleaning the copier’s glass scanner bed, as smudges or debris on the glass can transfer onto the copies. If the problem persists, check the copier’s drum unit or imaging unit for any signs of damage or wear. These components may need to be replaced to restore optimal copy quality. Regular maintenance, such as cleaning the copier’s internal components, can help prevent this issue from occurring.
Section 6: Network Connectivity Issues
In today’s digital age, copiers are often connected to office networks for increased functionality and convenience. However, network connectivity issues can arise and disrupt the copier’s ability to send or receive files. To troubleshoot network connectivity problems, check the copier’s network settings to ensure they are configured correctly. Restarting the copier and the network router or switch can also help resolve minor connection issues. If the problem persists, consult your IT department or a network technician to diagnose and address any network-related problems.
Section 7: Uneven or Crooked Copies
When your copier produces uneven or crooked copies, it can be frustrating and impact the professionalism of your documents. To troubleshoot this issue, start by checking the paper guides in the paper tray to ensure they are properly aligned. Adjust them if necessary to ensure the paper feeds straight into the copier. Additionally, clean the copier’s rollers to ensure they are not causing the paper to skew. If the problem persists, it may indicate a mechanical issue with the copier’s internal components, which may require professional assistance to resolve.
Section 8: Copier Not Turning On
If your copier does not turn on, there are a few troubleshooting steps you can take before seeking professional help. First, check that the copier is properly plugged into a working power outlet and that the power switch is turned on. If the copier is plugged into a surge protector or power strip, ensure that it is functioning correctly. If the copier still does not turn on, try plugging it into a different power outlet to rule out any electrical issues. If none of these steps resolve the problem, it is advisable to contact a technician to diagnose and repair the copier.
Section 9: Strange Noises or Odors
If your copier is emitting strange noises or odors during operation, it may indicate a mechanical or electrical problem. To troubleshoot this issue, first, check for any visible obstructions or foreign objects inside the copier and remove them if present. Next, inspect the copier’s internal components, such as the fuser or toner cartridge, for any signs of damage or wear. If you notice any burning smells or excessive heat, immediately turn off the copier and contact a technician, as these can be signs of a serious electrical problem.
Section 10: Regular Maintenance and Professional Servicing
Preventing copier problems is always better than troubleshooting them. Regular maintenance can help extend the life of your copier and reduce the frequency of issues. This includes cleaning the copier’s internal components, such as the glass scanner bed and rollers, on a regular basis. Additionally, following the manufacturer’s recommended maintenance schedule and promptly addressing any minor issues can prevent them from escalating into major problems. Lastly, consider scheduling regular professional servicing for your copier to ensure optimal performance and identify any potential issues before they become significant problems.
Case Study 1: Paper Jams Resolved
In a bustling law firm located in Lauderhill, Florida, the copier was constantly plagued with paper jams. The office manager, Ms. Johnson, was frustrated as it disrupted the workflow and caused delays in delivering important legal documents to clients. She decided to take matters into her own hands and troubleshoot the problem.
Ms. Johnson began by carefully examining the copier to identify any visible issues. She noticed that the paper tray was overloaded, leading to misfeeds and subsequent paper jams. She promptly removed excess paper and adjusted the tray to accommodate the correct amount of paper.
However, the paper jams persisted. Ms. Johnson then decided to clean the copier’s feed rollers, as dirt and debris can often accumulate and hinder proper paper feeding. Using a lint-free cloth and a mild cleaning solution, she gently wiped the rollers, ensuring they were free from any obstructions.
After performing these troubleshooting steps, the paper jams significantly reduced. Ms. Johnson also educated the office staff on proper paper loading techniques and encouraged them to report any recurring issues promptly. This proactive approach not only resolved the paper jam problem but also improved overall copier maintenance in the office.
Case Study 2: Faded Prints Restored
In a bustling marketing agency in Lauderhill, the copier was producing faded prints, much to the dismay of the creative team. Mr. Rodriguez, the IT manager, took it upon himself to troubleshoot the issue and restore the quality of the prints.
Upon inspection, Mr. Rodriguez discovered that the copier’s toner cartridge was running low. He promptly replaced the cartridge with a new one, ensuring it was compatible with the copier model. However, the faded prints persisted.
Realizing that the problem might lie with the copier’s imaging drum, Mr. Rodriguez decided to clean it. He carefully removed the drum unit and gently wiped it with a soft, lint-free cloth. This removed any residual toner or debris that might have been affecting the print quality.
After reassembling the copier, Mr. Rodriguez performed a test print, and to his satisfaction, the prints were now vibrant and clear. He also scheduled regular maintenance checks and cleaning of the copier’s imaging components to prevent future print quality issues.
Case Study 3: Network Connectivity Restored
In a bustling accounting firm in Lauderhill, the copier suddenly lost its network connectivity, making it impossible to scan and send documents directly to email addresses. Mr. Thompson, the office administrator, was determined to troubleshoot the issue and restore the copier’s network functionality.
Mr. Thompson began by checking the copier’s network cables and connections. He discovered that a cable had become unplugged, causing the loss of connectivity. He promptly reconnected the cable, ensuring it was securely fastened.
Despite reconnecting the cable, the copier still failed to establish a network connection. Mr. Thompson then accessed the copier’s network settings and discovered that the IP address had been inadvertently changed. He reconfigured the IP address to match the network’s specifications.
After these troubleshooting steps, the copier successfully reconnected to the network, enabling seamless scanning and document sharing. Mr. Thompson also implemented regular network checks to prevent similar connectivity issues in the future.
1. Paper Jams
Paper jams are a common issue that can disrupt the workflow in any office. When a copier experiences a paper jam, it means that the paper has become stuck somewhere along the paper path. To troubleshoot this problem, follow these steps:
1.1 Check for Obstructions
Start by opening the paper tray and inspecting it for any loose paper or foreign objects that may be causing the jam. Remove any obstructions carefully to avoid damaging the copier.
1.2 Clear the Paper Path
If the obstruction is not in the paper tray, open the front cover of the copier and locate the jammed paper. Gently pull the paper out in the direction of the paper path. Be cautious not to tear the paper, as this can lead to further complications.
1.3 Reset the Copier
After removing the paper jam, close all covers and trays securely. Power off the copier, wait for a few seconds, and then power it back on. This will reset the copier and clear any residual errors that may have occurred due to the paper jam.
2. Poor Print Quality
If your copier is producing prints that are blurry, streaky, or faded, it can significantly impact the professionalism of your documents. Here are some troubleshooting steps to improve print quality:
2.1 Clean the Print Heads
Over time, the print heads in your copier can become clogged with dried ink or toner, resulting in poor print quality. Consult your copier’s user manual to locate the print head cleaning function and run it to remove any blockages.
2.2 Replace the Toner or Ink Cartridge
If cleaning the print heads doesn’t resolve the issue, it may be time to replace the toner or ink cartridge. Consult the copier’s user manual for instructions on how to safely replace the cartridge, ensuring you use the correct replacement cartridge for your specific copier model.
2.3 Adjust Print Settings
Check the print settings on your computer or within the copier’s control panel. Ensure that the print quality settings are set to the appropriate level for your desired output. Higher-quality settings may take longer to print but can result in crisper and more vibrant prints.
3. Error Codes
Copiers often display error codes to indicate specific issues or malfunctions. Understanding these error codes can help you troubleshoot the problem more effectively. Here are a few common error codes and their potential solutions:
3.1 Error Code E001
This error code typically indicates a problem with the copier’s temperature. It may be caused by a faulty thermistor or a malfunctioning heating element. Contact a professional technician to diagnose and repair the issue.
3.2 Error Code E03
Error code E03 usually indicates a paper jam. Follow the steps outlined in the “Paper Jams” section to clear the jam and reset the copier.
3.3 Error Code E50
Error code E50 suggests a malfunction in the fuser assembly. The fuser is responsible for bonding the toner or ink to the paper. Turn off the copier, wait for a few minutes, and then power it back on. If the error persists, contact a professional technician for assistance.
4. Network Connectivity Issues
In today’s digital age, copiers often come equipped with network connectivity features. If you’re experiencing difficulties connecting your copier to your office network, follow these troubleshooting steps:
4.1 Check Network Settings
Ensure that the copier’s network settings are configured correctly. Verify the IP address, subnet mask, and gateway settings to ensure they match your office network’s requirements. Refer to the copier’s user manual for instructions on accessing and modifying these settings.
4.2 Restart Network Devices
If the copier still doesn’t connect to the network, power off your copier, modem, router, and any other network devices. Wait for a few minutes, then power them back on in the following order: modem, router, copier. This can help refresh the network connection and resolve any temporary issues.
4.3 Update Firmware
Check if there are any firmware updates available for your copier. Manufacturers often release firmware updates to address known issues and improve performance. Visit the manufacturer’s website or contact their support for instructions on how to update the copier’s firmware.
By following these troubleshooting steps, you can address common copier problems in your Lauderhill office and keep your workflow running smoothly. However, if the issues persist or are beyond your technical expertise, it’s always recommended to seek assistance from a professional copier technician.
The Evolution of Copiers
Before we delve into the historical context of troubleshooting copiers, it is important to understand the evolution of these machines over time. Copiers, also known as photocopiers or xerox machines, have come a long way since their inception in the early 20th century.
In the early 1900s, the concept of copying documents was a laborious and time-consuming process. People had to rely on methods like carbon paper or mimeograph machines to create duplicates. However, these methods were far from efficient and often resulted in poor quality copies.
It was not until the late 1940s that the first commercial copier, the Xerox Model A, was introduced by the Haloid Company (later renamed Xerox Corporation). This machine used a photographic process to make copies, revolutionizing the way documents were duplicated.
Over the next few decades, copiers continued to evolve, becoming faster, more reliable, and capable of producing higher-quality copies. The of automatic document feeders, duplex printing, and electronic sorting features made copiers even more efficient and user-friendly.
The Need for Troubleshooting
As copiers became more advanced, they also became more complex machines. With increased complexity came a greater likelihood of encountering technical issues and malfunctions. This gave rise to the need for troubleshooting guides and resources to help users resolve common copier problems.
In the early days of copier technology, troubleshooting was often left to trained technicians who had a deep understanding of the inner workings of these machines. However, as copiers became more commonplace in offices and businesses, it became necessary for users to have some basic troubleshooting knowledge.
The first troubleshooting guides for copiers were typically provided by the manufacturers themselves. These guides included step-by-step instructions on how to identify and resolve common issues, such as paper jams, image quality problems, or error codes.
As copiers continued to evolve and become more sophisticated, so did the troubleshooting guides. Manufacturers started including more detailed explanations and diagrams to help users better understand the inner workings of their machines.
The Rise of Online Resources
In recent years, with the advent of the internet, troubleshooting copier problems has become even more accessible. Online resources, such as articles, forums, and video tutorials, have made it easier for users to troubleshoot and resolve issues without the need for professional assistance.
Today, a quick search on the internet can yield a multitude of troubleshooting guides for common copier problems. These guides provide step-by-step instructions, accompanied by images or videos, to help users diagnose and fix issues on their own.
Additionally, manufacturers now often provide online support portals where users can find troubleshooting guides specific to their copier models. These portals may also offer live chat or phone support, allowing users to seek assistance directly from the manufacturer’s technical support team.
The Current State of Copier Troubleshooting
In the current state, troubleshooting common copier problems has become more accessible and user-friendly than ever before. With the abundance of online resources and manufacturer support, users can often resolve minor issues without the need for professional intervention.
However, it is important to note that not all copier problems can be easily fixed by users. Complex issues or mechanical failures may still require the expertise of a trained technician. In such cases, it is advisable to seek professional assistance to avoid further damage to the machine.
As copier technology continues to advance, it is likely that troubleshooting methods will also evolve. Artificial intelligence and remote diagnostic tools may become more prevalent, allowing for more efficient and accurate troubleshooting processes.
Overall, the historical context of troubleshooting copier problems highlights the evolution of copiers themselves, from simple machines to complex devices. It also demonstrates the increasing accessibility of troubleshooting resources, empowering users to resolve common issues and minimize downtime in their offices.
FAQs
1. Why is my copier not turning on?
There could be a few reasons why your copier is not turning on. First, make sure that it is plugged into a working power outlet. If it is plugged in and still not turning on, check the power switch on the copier itself. Sometimes, it may accidentally get switched off. If the power switch is on and the copier still won’t turn on, it could be a more serious issue that requires professional assistance.
2. What should I do if my copier is producing blurry or smudged copies?
If your copies are coming out blurry or smudged, the first thing to check is the copier’s glass surface. Make sure it is clean and free from any smudges or debris. Additionally, check the toner or ink levels and replace them if they are low. If the problem persists, it could be a sign of a more significant issue with the copier’s drum or fuser unit, and you should contact a technician for further assistance.
3. How can I fix paper jams in my copier?
Paper jams are a common issue with copiers. To fix a paper jam, start by opening the appropriate panels or doors to access the paper path. Gently remove any visible jammed paper, being careful not to tear it. If the paper is stuck and cannot be easily removed, refer to your copier’s user manual for specific instructions on how to clear paper jams. It is important to follow the recommended steps to avoid causing any damage to the copier.
4. Why is my copier making strange noises?
If your copier is making unusual noises, it could be an indication of a mechanical issue. Check for any loose parts or foreign objects that may have gotten stuck inside the copier. Sometimes, paper clips, staples, or bits of torn paper can cause strange noises. If you cannot identify the source of the noise or if it continues after removing any obstructions, it is best to contact a professional technician for further evaluation and repair.
5. What should I do if my copier is displaying error codes?
Error codes on copiers are designed to indicate specific issues or malfunctions. When you encounter an error code, refer to your copier’s user manual or online resources provided by the manufacturer to identify the meaning of the code. The manual or online resources should also provide instructions on how to resolve the specific error. If you are unable to resolve the issue on your own, contacting a technician with knowledge of your copier’s brand and model is recommended.
6. How can I improve the quality of my copies?
If you are not satisfied with the quality of your copies, there are a few steps you can take to improve it. Start by checking the toner or ink levels and replacing them if they are low. Additionally, clean the copier’s glass surface and any other accessible parts that may affect copy quality. Adjusting the settings on the copier, such as the resolution or contrast, can also help improve the output. If these steps do not yield satisfactory results, consider contacting a technician for further assistance.
7. What should I do if my copier is not connecting to my computer?
If your copier is not connecting to your computer, ensure that the appropriate drivers are installed on your computer. These drivers allow your computer to communicate with the copier. Check the manufacturer’s website for the latest drivers compatible with your operating system. If the drivers are installed correctly and the issue persists, try restarting both the copier and your computer. If the problem continues, consult the copier’s user manual or contact the manufacturer’s support for further guidance.
8. Why is my copier printing blank pages?
If your copier is printing blank pages, it could be due to several reasons. First, check the toner or ink levels and replace them if they are low. Make sure that the cartridges are properly installed and seated in their designated slots. If the cartridges are in place and the issue persists, it could be a clogged print head or a malfunctioning component. Consider running a print head cleaning cycle or contacting a technician for further assistance.
9. How can I prevent paper jams in my copier?
To prevent paper jams in your copier, always ensure that the paper is properly loaded and aligned in the paper tray. Do not overload the tray with too much paper, as this can increase the likelihood of jams. Make sure to use the correct type and size of paper recommended by the copier’s manufacturer. Regularly cleaning the copier’s paper path and rollers can also help prevent paper jams. If you frequently experience paper jams despite taking these precautions, it may be necessary to have the copier serviced by a professional technician.
10. How often should I service my copier?
The frequency of servicing your copier depends on various factors, including the copier’s usage and manufacturer’s recommendations. As a general guideline, it is advisable to have your copier serviced at least once a year to ensure optimal performance and prevent potential issues. However, if you notice any recurring problems or a decline in print quality, it is best to have the copier serviced sooner. Regular maintenance can help extend the lifespan of your copier and minimize downtime.
1. Keep the copier clean and dust-free
Regularly clean the copier to prevent dust and debris from clogging the internal components. Use a soft, lint-free cloth and mild cleaning solution to wipe down the exterior surfaces and remove any dirt or smudges. Be careful not to spray any liquid directly onto the copier.
2. Use high-quality paper
Invest in good quality paper that is suitable for your copier. Low-quality or incompatible paper can cause paper jams, misfeeds, and other printing issues. Check your copier’s user manual for recommended paper specifications and always store the paper in a cool, dry place.
3. Properly load the paper tray
When loading paper into the copier’s paper tray, make sure to align it properly and adjust the paper guides to fit the size of the paper. Overloading the tray or using crumpled or damaged paper can lead to paper jams and other problems.
4. Avoid overuse and overheating
Give your copier regular breaks to prevent overheating. Copiers are designed for specific duty cycles, so avoid exceeding the recommended number of copies or prints per day. If you have a large volume of documents to copy or print, consider breaking it up into smaller batches.
5. Familiarize yourself with the copier’s features
Take the time to read the user manual and understand all the features and functions of your copier. Knowing how to properly use the various settings, such as paper size, print quality, and finishing options, can help you avoid unnecessary problems and achieve better results.
6. Address paper jams promptly
If you encounter a paper jam, follow the instructions provided by the copier’s manufacturer to safely clear it. Avoid yanking or pulling the paper forcefully, as this can damage the copier. Take your time and be gentle when removing the jammed paper to prevent any torn pieces from getting stuck inside.
7. Perform regular maintenance
Follow the recommended maintenance schedule for your copier. This may include tasks such as cleaning the rollers, replacing the toner or ink cartridges, or updating the firmware. Regular maintenance can help identify and prevent potential issues before they become major problems.
8. Update drivers and software
Keep your copier’s drivers and software up to date. Check the manufacturer’s website regularly for any available updates or patches. Updated drivers can improve the copier’s performance and compatibility with different operating systems.
9. Keep a backup of important documents
Make it a habit to regularly backup important documents stored on your copier. This can be done by saving electronic copies on a separate storage device or cloud service. In case of any copier malfunction or data loss, you will have a backup to rely on.
10. Contact professional support when needed
If you encounter persistent issues or problems beyond your troubleshooting abilities, don’t hesitate to contact professional support. They have the expertise and resources to diagnose and fix complex copier problems. Trying to fix the copier yourself may cause further damage or void any warranty.
Conclusion
Troubleshooting common copier problems in your Lauderhill office can save you time, money, and frustration. By following these simple steps, you can easily identify and resolve issues such as paper jams, poor print quality, and error messages. Firstly, make sure to check for any paper jams and clear them using the proper procedure. Additionally, cleaning the copier regularly and ensuring that it is properly maintained can greatly improve its performance. Secondly, if you are experiencing poor print quality, consider checking the toner levels and replacing the cartridge if necessary. Lastly, error messages can be resolved by referring to the copier’s manual or contacting the manufacturer’s customer support for assistance.
By implementing these troubleshooting techniques, you can keep your copier running smoothly and avoid unnecessary downtime. Remember to always follow the manufacturer’s guidelines and seek professional help if needed. Taking care of your copier will not only extend its lifespan but also contribute to a more efficient and productive office environment. So, the next time you encounter a copier problem, don’t panic – just follow these troubleshooting steps and get back to work in no time.